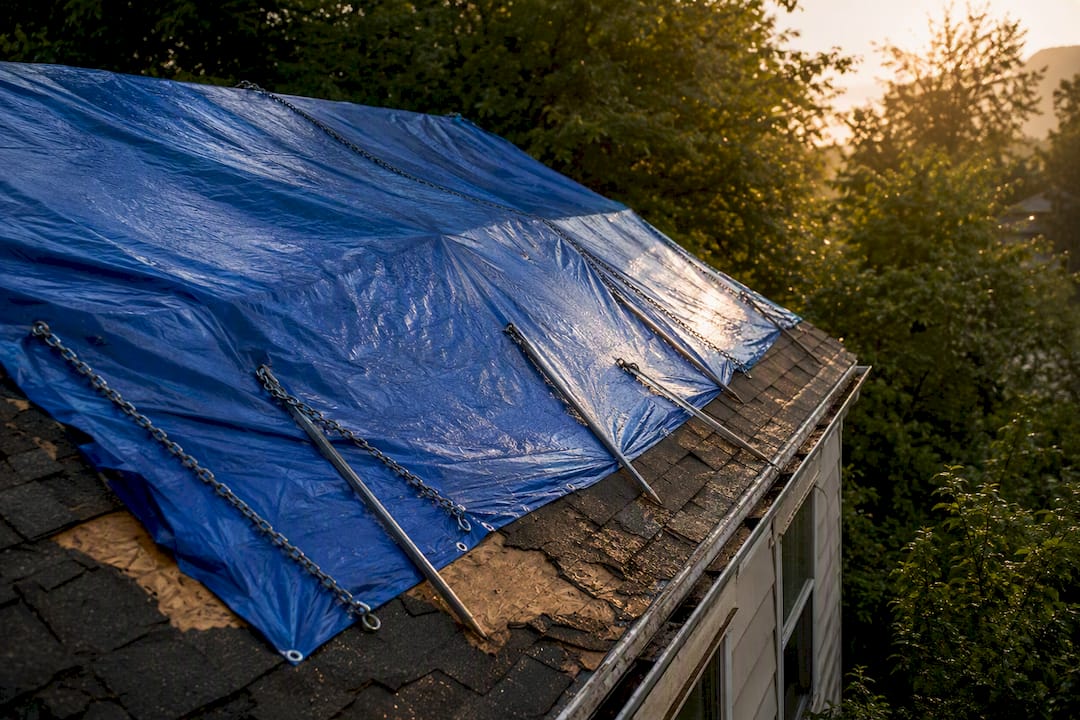
A tarp is not a repair. It is a temporary shield that keeps water out of your roof deck, insulation, and ceilings while you wait for an adjuster and a permanent fix. Applied correctly, a properly fastened tarp can hold through weeks of Georgia thunderstorms and protect both your home and your claim. Applied carelessly, it tears loose in the first gust, abrades the shingles it was meant to protect, and leaves you with a second problem on top of the first.
What actually decides whether a tarp helps or hurts comes down to five things: when to tarp, which materials hold, how to fasten them so they stay, how to document the damage for your carrier, and the safety lines you never cross.
When a Roof Actually Needs Emergency Tarping
Tarp the roof as soon as water is entering the structure or the deck is exposed to open sky. In practice that means any of the following:
- Missing or displaced shingles over a living space, especially where the underlayment is torn or exposed.
- A puncture or hole from a fallen limb, flying debris, or impact damage.
- Damaged flashing, ridges, or valleys, where water is funneled and concentrated into a small area.
- An active drip or stain appearing on attic decking or a ceiling below.
- A permanent repair scheduled days or weeks out while rain remains in the forecast.
Skip the tarp when the damage is purely cosmetic, when the area beneath stays dry, or when reaching the damage would require walking a wet, steep pitch. A tarp on a sound, dry roof adds risk without adding protection.
Tarp Materials: What Holds and What Fails
Not all blue tarps are equal, and the cheapest options are the ones most likely to fail overnight.
- 6-mil woven polyethylene is the practical minimum for a residential roof. It resists tearing around fasteners and survives UV exposure for several weeks.
- 10-mil to 12-mil reinforced poly is worth the extra cost for spans beyond roughly 20 feet, or for any tarp expected to stay up more than a month.
- 4-mil painter's drop cloth poly is a paint cover, not a roof cover. It shreds at the grommets in moderate wind.
- Canvas is heavy, absorbs water, and turns dangerously slick once wet. Leave it out of the plan.
Fasteners matter as much as the sheet itself. Lumber battens, plastic-cap roofing nails, and washer-head screws hold a tarp down. Bricks, cinder blocks, rope, and bungee cords do not, and loose ballast becomes a projectile in high wind.
Stage These Materials Before You Climb
- Tarp sized to overhang every edge by at least 3 to 4 feet
- Two or more 1x4 or 2x4 battens, 8 to 12 feet long
- Plastic-cap roofing nails or washer-head screws long enough to bite into solid decking
- Utility knife, hammer or driver, and a tape measure
- Fall-protection harness anchored to a rated point, plus non-slip footwear
- Work gloves, safety glasses, and a phone in a pocket rather than on the ground
How to Tarp a Storm-Damaged Roof
- Photograph everything first. Shoot wide frames of each slope, then close-ups of the damage, before a single tarp is unfolded. This is your "before" record for the claim.
- Work from the top down. Position the tarp so its upper edge sits above the highest damage, letting water run over the lower laps instead of underneath them.
- Overhang the ridge and the eaves. Water that reaches a flush edge travels sideways along the deck. Extend past every transition.
- Fasten along battens, not grommets alone. Roll the tarp edge around a batten and drive nails or screws through the batten into solid decking, spacing fasteners roughly 12 to 18 inches apart.
- Anchor into sound material. Never fasten only into the damaged area; spread wind load across intact decking or the fascia.
- Confirm the drainage path. Check that the tarp sheds water into a gutter or clear of the roof, rather than into a valley where it can pond.
Documenting the Damage for Your Insurance Claim
Most homeowner policies require you to take reasonable steps to prevent further damage after a covered loss. Tarping is how you satisfy that duty, and the record you build while doing it frequently determines how smoothly the claim resolves.
- Photograph before, during, and after. Date-stamped images of the damage, the finished tarp installation, and any interior staining.
- Keep every receipt. Tarps, lumber, fasteners, and emergency labor are commonly reimbursable mitigation costs under a covered claim.
- Report promptly and get a claim number. Record the date, time, and the name of the representative you spoke with.
- Do not discard damaged material. Keep punctured shingles, torn flashing, or limb fragments until the adjuster has inspected them.
- Do not sign a release before the full scope of damage has been documented.
Safety Rules That Are Not Negotiable
- Stay off the roof in rain, ice, or high wind. A wet shingle is more dangerous than the leak it hides.
- Wear fall protection. A harness anchored to a rated point, every time, regardless of pitch.
- Keep clear of power lines. Never raise a metal ladder, batten, or tarp near a service drop.
- Use a buddy system. Someone on the ground who can call for help is part of the equipment list.
- Watch the heat. Georgia afternoons on a dark roof deck reach dangerous surface temperatures quickly.
What Tarping Does Not Fix
A tarp will not restore structural integrity, will not stop mold that has already begun in a wet attic, and will not settle a claim. It buys time. Treat it as the first step in a documented process: protect the interior, record the damage, notify your carrier, and get a licensed contractor onto the roof to establish the real extent of the loss.
Frequently Asked Questions About Emergency Roof Tarping
When should you tarp a roof after storm damage?
Tarp the roof as soon as water is entering the structure or the deck is exposed to open sky: missing or displaced shingles over a living space, a puncture from a fallen limb or flying debris, damaged flashing, ridges, or valleys, an active drip or stain on attic decking or a ceiling below, or a permanent repair scheduled days or weeks out while rain remains in the forecast. Skip the tarp when the damage is purely cosmetic, the area beneath stays dry, or reaching the damage would require walking a wet, steep pitch.
What kind of tarp holds up best on a damaged roof?
6-mil woven polyethylene is the practical minimum for a residential roof, and 10-mil to 12-mil reinforced poly is worth the extra cost for spans beyond roughly 20 feet or any tarp expected to stay up more than a month. A 4-mil painter's drop cloth shreds at the grommets in moderate wind, and canvas absorbs water and turns dangerously slick once wet. Fasteners matter as much as the sheet: lumber battens, plastic-cap roofing nails, and washer-head screws hold a tarp down, while bricks, cinder blocks, rope, and bungee cords do not.
How do you document tarping for an insurance claim?
Photograph before, during, and after with date-stamped images of the damage, the finished tarp installation, and any interior staining. Keep every receipt for tarps, lumber, fasteners, and emergency labor, which are commonly reimbursable mitigation costs under a covered claim. Report promptly, get a claim number, and record the date, time, and the representative's name. Keep damaged material such as punctured shingles or torn flashing until the adjuster has inspected it, and do not sign a release before the full scope of damage has been documented.
Does tarping a roof fix the damage?
No. A tarp will not restore structural integrity, will not stop mold that has already begun in a wet attic, and will not settle a claim. It buys time. Treat it as the first step in a documented process: protect the interior, record the damage, notify your carrier, and get a licensed contractor onto the roof to establish the real extent of the loss.
Related Reading
- Roof Leak Insurance: When Coverage Applies and How to Claim It
- How to Identify Hail Damage on Your Roof After a Georgia Storm
Need Emergency Roof Tarping?
Patton Roof Systems provides zero-obligation digital roof inspections with complete photo documentation for insurance adjusters across Georgia.
Schedule Your Free Roof Inspection →